
Loading...

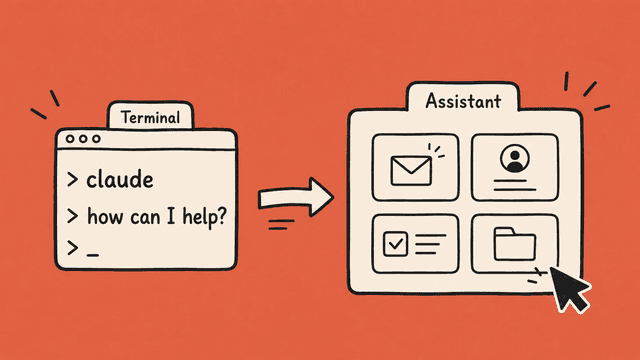
Claude Code can be much more than a tool for developers. Set up properly, it can also work as a personal assistant that knows you, connects to your tools, and can actually do tasks for you.
This guide is written for beginners. It walks through the setup in a simple, practical way, without assuming you've used Claude Code or spent time in a terminal before.
Claude Code is a terminal-based version of Claude that works directly in folders and files on your machine. So it's not just a chat you type into in the browser. It's a working tool that can read files, create files, edit content, and use various integrations.
It's also worth knowing that Claude Code is not the same as Claude in the browser. Even though you log in with the same account, the memory doesn't behave the same way. Claude Code inherits no memories from what you've done in the regular chat; it starts from scratch. That means you have to give Claude Code context about you in a different way if it's going to be a good personal assistant.
Before you start, you'll need:
a Mac, Windows, or Linux machine
a Claude account with a Pro subscription or higher
some idea of what you want to use the assistant for
For most people the subscription is the natural choice. It's usually simpler and a lot cheaper than paying via the API.
Note: Anthropic recently made some changes to the Pro subscription where some new customers don't have access to Claude Code. The only way to find out if this applies to you is to test it.
You install Claude Code from the terminal on your machine. What's the terminal, you might ask?
The terminal is a text-based window on your machine where you type commands instead of clicking. On Mac the program is called Terminal, on Windows you use PowerShell or Windows Terminal. In practice you just need to copy the commands from the guide below and press enter.
Pick your operating system below.
On Mac, paste the command below into the terminal and press enter:
curl -fsSL https://claude.ai/install.sh | bash
When the installation finishes, the terminal might still not find Claude Code right away. You'll get a message with "Setup notes" asking you to paste in one more snippet. On Mac the snippet looks like this:
echo 'export PATH="$HOME/.local/bin:$PATH"' >> ~/.zshrc && source ~/.zshrc
Paste it, press enter, and Claude Code is ready to use.
Start Claude Code by typing claude in the Terminal and pressing enter.
Pick your visual theme (e.g. Light mode or Dark mode) with the arrow keys.
You'll be asked to log in. Pick the option "Primary: Claude account with subscription".
Your browser will open automatically. Approve the login (Authorize).
Close the browser window and go back to the Terminal. Press Enter to accept the security warnings and recommended settings.
In Windows PowerShell, paste the following:
irm https://claude.ai/install.ps1 | iex
Claude Code requires git-bash to run, so if you get an error message when you run the command above, you'll need to install it first:
Pick the top option that says "Click here to download the latest…"
Start the installation and click next on every option (keep the default choices)
Tick Launch Git Bash when the installation is done
Once git-bash is installed, go back to the first terminal (PowerShell) and run the install command again: irm https://claude.ai/install.ps1 | iex
You'll now get Setup notes with one more thing to do before Claude Code is fully set up:
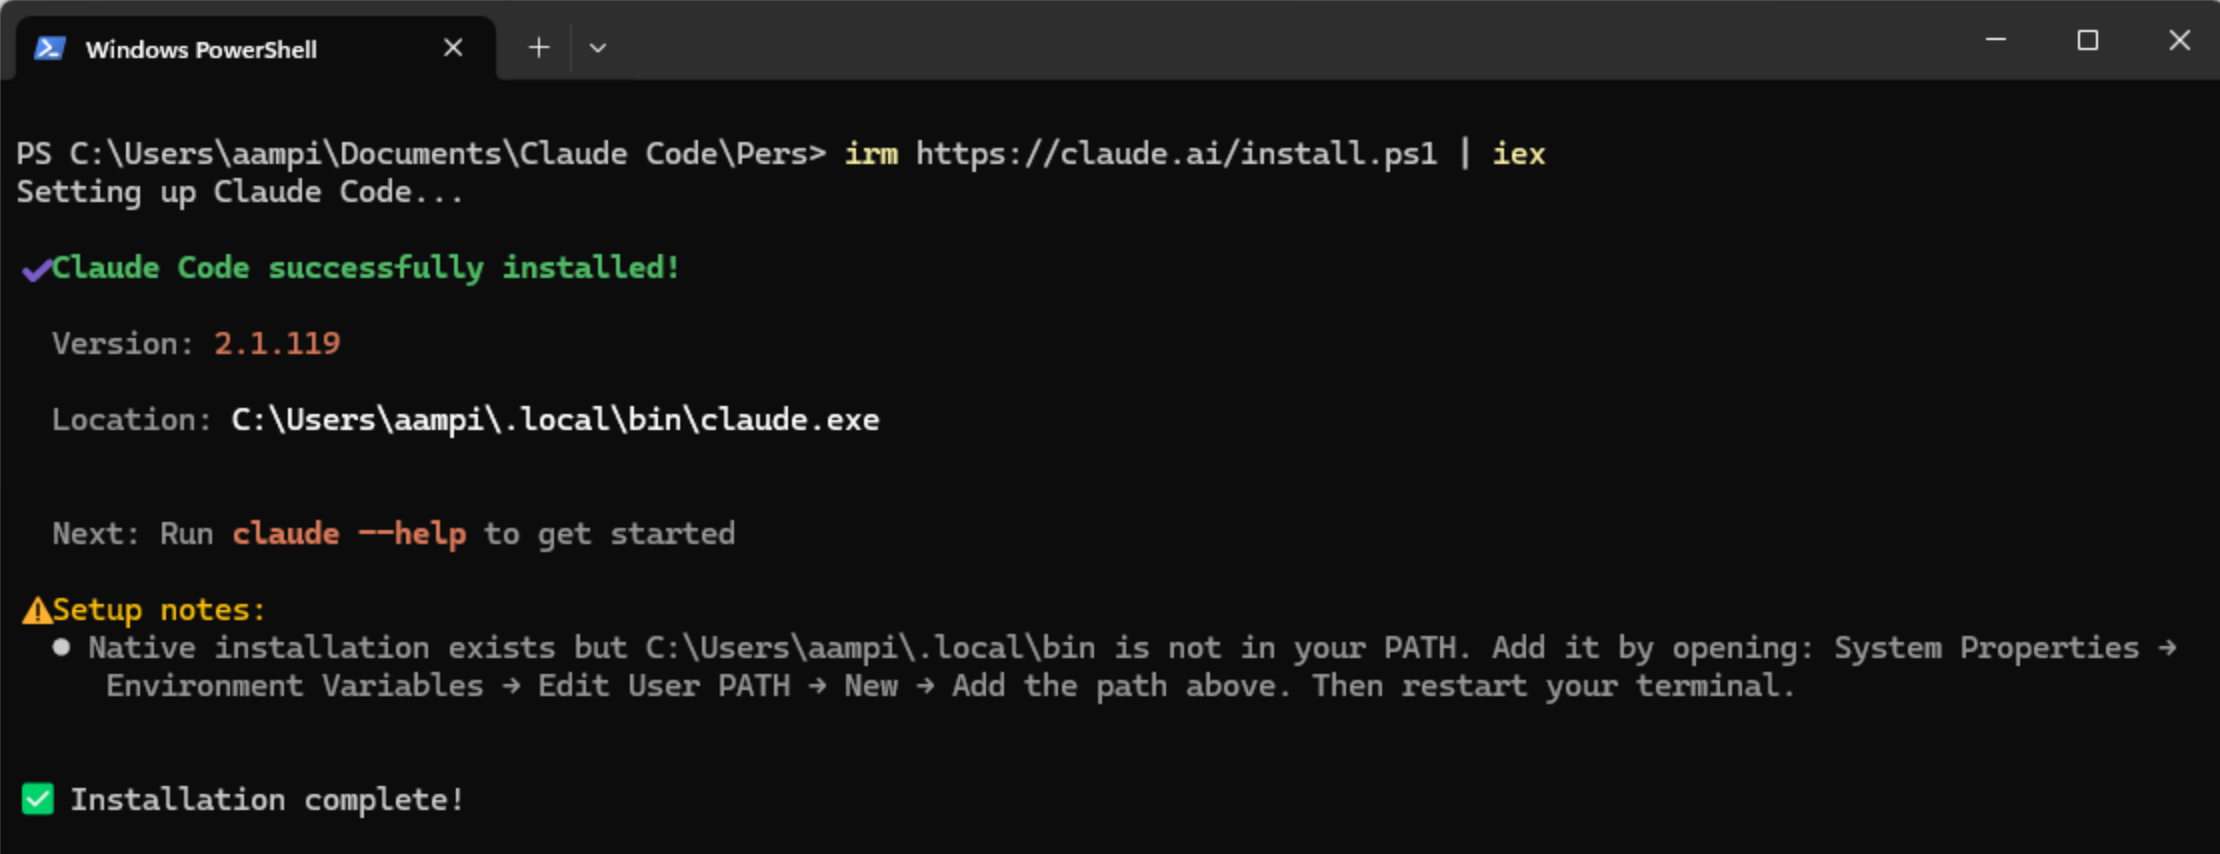
Do the following:
Copy the path shown under Setup notes (mine is: C:\Users\aampi.local\bin)
Open the start menu and search for environment variables, then open "Edit the system environment variables"
Click "Environment variables" at the bottom right
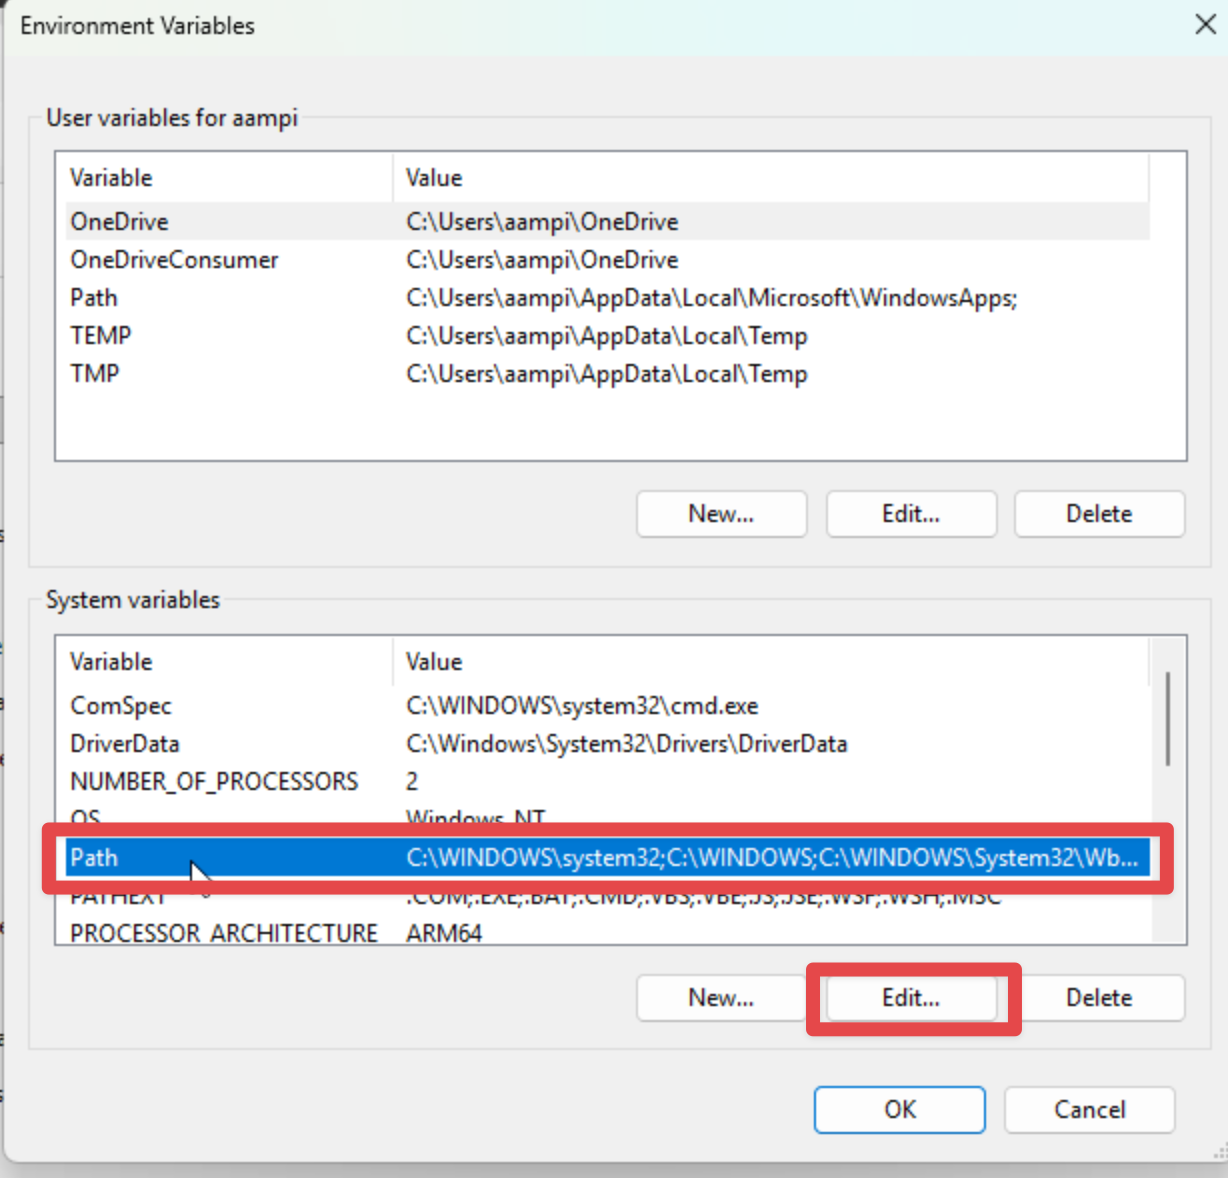
Find "Path" under System variables and click Edit
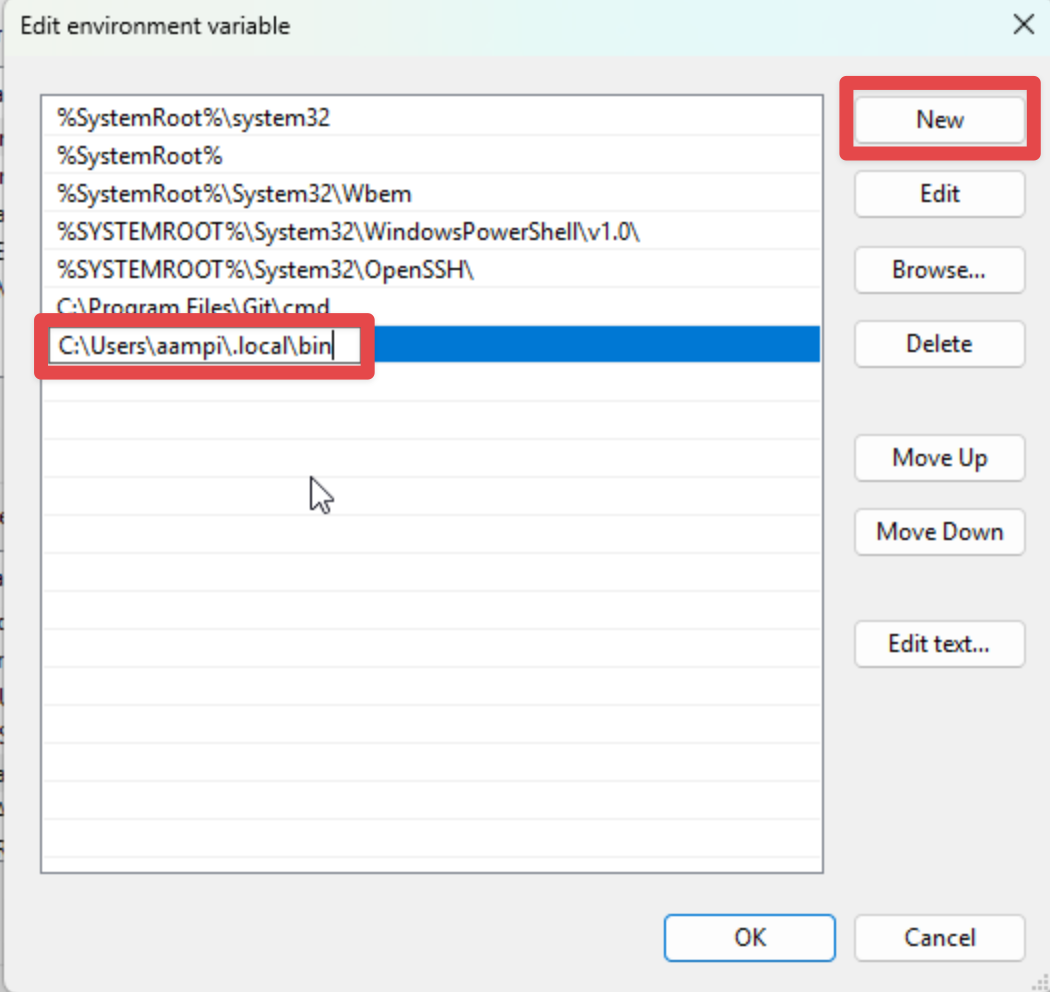
Click OK on every window until you've closed all the windows you just opened
Close the terminal and open PowerShell again
Claude Code is now installed and you're ready to continue.
Sign in or create a free account to continue.
No trial, no credit card, no mandatory newsletter.
